Materials:
- 20 T-shirts
- Two spools of thread
- 2 3/4 yards fleece 65 inches wide
- Serger
- Yarn
- Scissors and/or rotary cutting tool
- Cutting Mat
- Non-sewing scissors
- Curved needle
- Measuring tape
Gather twenty T-shirts. Most sizes work as long as there's a 15 inch square where the graphic sits.
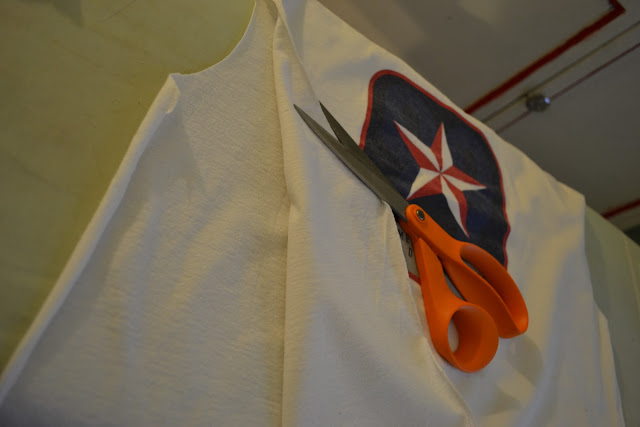
Iron the shirts. Use a cloth on top of any screen printed areas to avoid melting them. Cut the sleeves off of the T-shirts and cut a slit up the sides and across the top. Remove the fronts of the shirts, and set the backs aside to be used as rags.
Use a pair of scissors (NOT your sewing scissors) to cut a square of cardboard 15'' x 15". This will be your pattern for the quilt squares.
Place the shirt on the rotary cutting mat. Center the pattern on the T-shirt graphic, and use your rotary cutting tool to trim the shirts into squares. If you don't use the rotary tool, you might want to trace the pattern and then use scissors to cut on the lines.

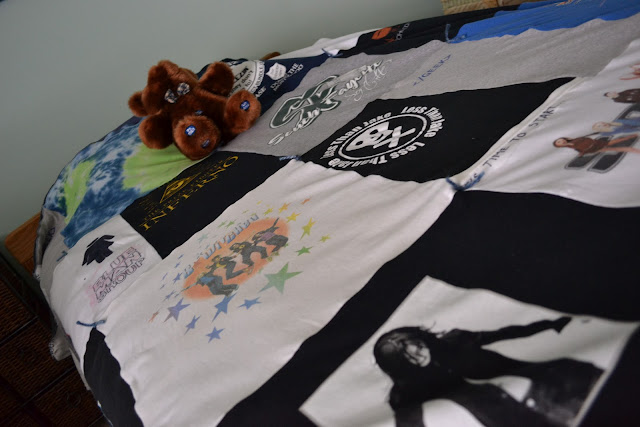
Use the serger or the serge setting on your sewing machine to join the columns of squares. Be sure to sew the squares right sides together with the top of the square being sewn to the bottom of the square directly above. Press the seams downward. Sew the columns together to form the top of your throw. Again, press all of the seams to the right. Do not skip this step.
Spread out the fleece, and lay the quilt top on top of the fleece. The wrong sides should be together. Carefully trim around the fleece to be the same exact size as the quilt.
Cut 12 pieces of yarn about 8 inches long, and locate your curved needle.
Use the curved needle threaded with yarn to join the top to the fleece at the places where the four corners of the squares are joined. The needle should go down and then back up, but then don't pull the yarn through. Instead, remove the needle, and tie the yarn in three knots.
Trim the yarn leaving tails about one inch long.
Serge around the edges of the blanket. Press the edges, and snuggle down under the throw with a good book. This blanket is even big enough to cover a twin sized bed.


I wanted to make one of these for my son but he said don't bother. I just might have to do one for my 2nd son. And I will definitely make one for my daughter when she's older and we have tshirts of her activities. I'd love you to come link this up at my Pin Me Linky Party.
ReplyDeleteI did join up on your party, and I added it to my weekly link up page! My husband loved it, and I'm making one for him. I'm also going to make some small play blankets for my girls with shirts that are stained. I'll cut the stains off and make the fabric into blankets. I had vowed never to make a quilt again, but this changed my mind 100%!
DeleteAwesome! Thanks for linking up. Looking forward to you participating weekly!@
DeleteI look forward to it as well!
DeleteThis is total genius. I really want to try my hand at quilting but something always stops me. Maybe it can be a new year project.
ReplyDeleteThanks so much for linking up :)
Sarah @ A Cat-Like Curiosity
Definitely try this in the new year. Just be sure to serge the edges or use the knit setting on your sewing machine!
DeleteGreat quilt! I made a similar one once years ago for my brother with t-shirts dating up to over 20 years back. Guys really do get attached to their t-shirts! Your version looks like a much nice project as I fused and satin stitched each shirt onto woven cloth, added batting and quilted it on the machine. It took SO long and used SO much thread with the satin stitching! I think in the end your's is probably softer and all around more cuddly finished project as well. I had thought I'd never do it again, but if presented with the opportunity I might do it in this style!
ReplyDeleteMy friend chose this version without the fusing, and it did eliminate so many steps. The blanket is so soft and wonderful. It wouldn't be the same at all with the fusing method. Like you said, the time would be more too. Serging does take a while, but I'm sure not as much time as the steps that are skipped by doing it this way. You should try it!
DeleteWhat a great idea and great tutorial! Thank you for sharing at Sharing Saturday!
ReplyDeleteThis looks great! I have been wanting to try one of these! Thanks for the detailed tutorial!
ReplyDeleteWill totally have to do this - I have so many t-shirts that I can't bear to throw away!
ReplyDeleteLove this! Thanks for sharing and linking up to Thrifty Thursday!
ReplyDeleteLooks great and what a wonderful way to re-purpose those old t-shirts. Thanks for sharing at the All Star Block Party!
ReplyDeleteHolly